
Custom Project Request Forms
NOTE: Custom Project Request Forms and some other features described in this article are optional add-ons to Workzone. For details on adding these features if you don't have them already, please email help@workzone.com.
Learn more about Workzone Enterprise.
IN THIS ARTICLE
Forms created under the settings (gear icon) when viewing All Workspaces will show up in all workspaces (replacing the default generic form that displays otherwise), or they can be designated for a particular workspace only.
Create/Edit a Form
WARNING: Any users currently filling out an existing form when you begin editing it will lose their work.
When you first create a form or make any edits to an existing form, it is inactive and not available to users when they request a new project. When you are finished and ready for the form to be active for requesters, you can click the FORM INACTIVE switch in the top right, or click enable in the STATUS column for that form on the Custom Forms settings page. Also, a form can be hidden from requesters by clicking the disable link on the Custom Forms list or the aforementioned switch (which would show as FORM ACTIVE).

Deleting an existing form occurs on the Custom Forms list by clicking the delete link on that form's row. A form is not able to be deleted if any submitted requests remain that use that form.

Editing or creating a form will show the FORM BUILDER view, as seen here:

Form Settings


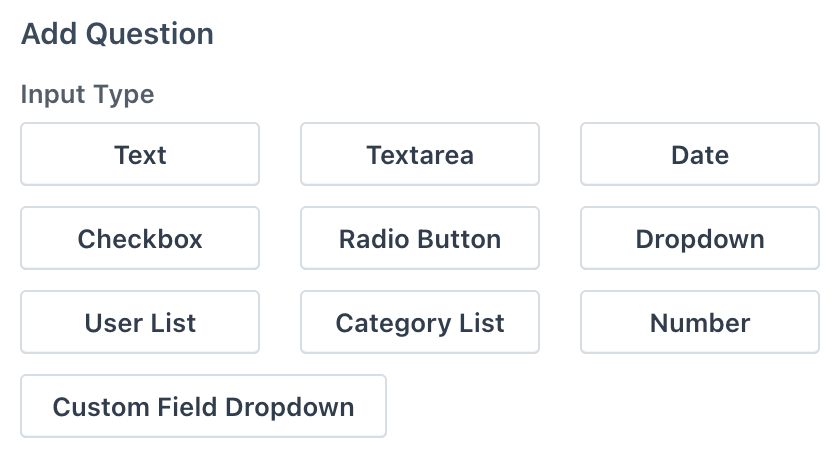
Form Questions

- Text - Provides a single line of any general text.
- Textarea - Provides multiple lines of any general text.
- Date - For this, a date picker displays where a requester can select a given date, displaying one month at a time. Entry is required in mm/dd/yyyy format (and can also be typed in).
- Checkbox - With this option, one or more labeled boxes can be specified for the requester to select (check).
- Radio Button - From the several options that can be specified, the requester can only select one option. Presenting each option on the form together with a circular selection button next to each.
- Dropdown - A listing of several options can be specified, with the requester being presented with the list (when clicked) and selecting only one option in that list.
- User List - A full list of users and resources already created within Workzone. This list will mirror exactly the list of users in the Responsible menu for projects and tasks.
- Category List - A full list of categories already created within Workzone. This list will mirror exactly the list of categories in the project-level Category menu.
- Number - A text field that only supports the entry of numeric characters.
- Custom Field Dropdown - A dropdown menu that is automatically populated with the values created via the Projects Custom Fields settings. Selecting this question type will require one of the existing project custom fields to be selected.
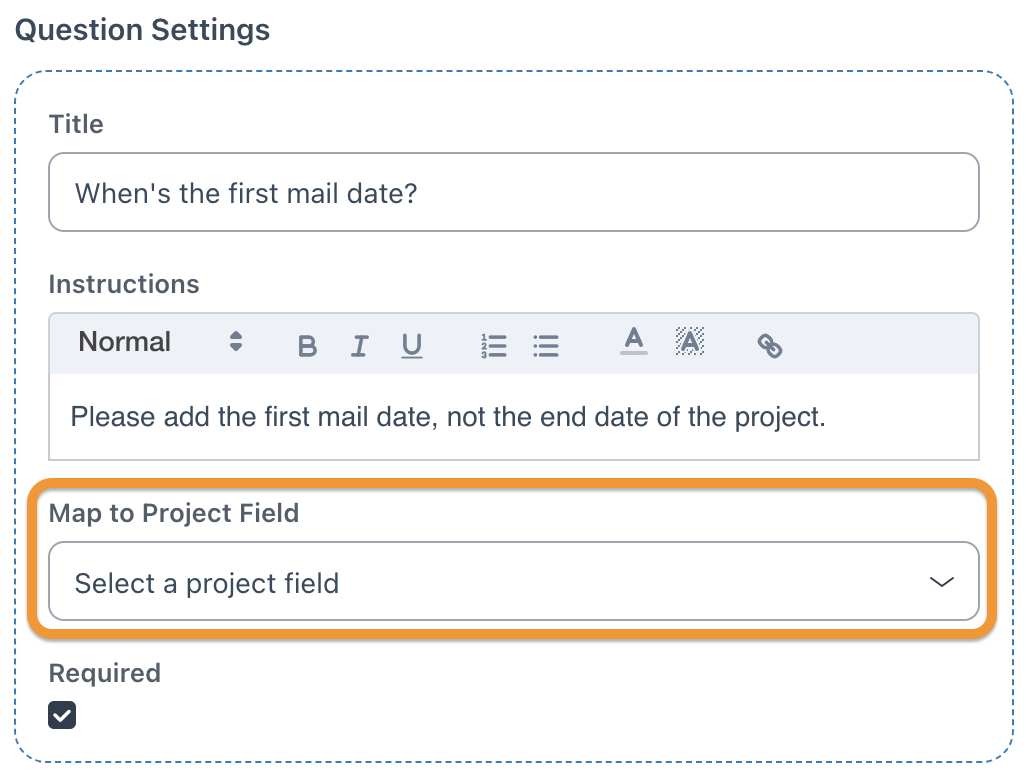
Once the input type is chosen, the Question Settings appear on the left, and you can enter the Title of the question as it will appear to the user, along with an Instructions box for additional details with an editor toolbar (that provides text formatting, linking, etc.).

To preview the form, click the Preview request form link in the top right.

Mapping Request Form Questions to Project Fields
With this feature enabled, the request form Question Settings editor will include an option to "Map to Project Field". Mapping these fields together will allow the data submitted in request forms to automatically be populated on the Add Project page when a project is created from a request.
The dropdown menu of selectable fields will include any project-level standard or custom field that matches the format of the request form field. For example, a date-formatted request form question will provide project-level date fields, like the Target End Date, to be selected for mapping. These are the request question formats that map to corresponding project fields:
- Text and Textarea - Both question types will map to text project fields. While text questions will map to both text or textarea fields, textarea questions will only map to textarea fields in the project.
- Date - Date questions will map to any date project field, including the Target End Date field.
- User List - A user list question can be mapped to any user list project field, including Project Responsible.
- Category List - A category list question can be mapped to any category list project field, including the standard Category field.
- Number - A number field can be mapped to any number field. Project number will not be included since project numbers allow both text and numeric characters.
- Custom Field Dropdown - The custom field dropdown menu question will be mapped to any of the existing Projects Custom Fields when the question is originally created.

A request form's data will only map to the project field if the project field is enabled on the Add Project page, as per the Fields to Display settings. When clicking the "Create linked project" button on a request, the Add Project page will display all mapped data in the corresponding fields automatically. This data may be modified or deleted on the Add Project.
Editing Existing Questions

WARNING: When you delete a question, you permanently delete any existing data from previous requests for that question. This cannot be undone so make sure you want to do this!
Sections


Conditional Logic (Show This Section)
For a selected section, the Show This Section option in the Section Settings on the left provides three choices, Always, When and Internally.

For a section set to Internally, it isn't shown on the request form page that the requester fills out. They appear only the Edit Request page, accessed by clicking the pencil icon at the top right of the details tray for an existing request. Internal sections are typically used for adding information to requests after they are submitted, such as tracking numbers or additional notations. Internal sections can be seen by all users who can access the Edit Request page, so they should not be used for sensitive information not appropriate for that full audience.
For When, a section (and the questions it contains) can be chosen to be displayed only if the user has responded with a designated answer to a specific previous question on the form. For instance, a user needing a website might only see questions about a given website module if they selected that they need that module. The trigger question for if a section should display should be the last question of its section, and the optionally displaying section should immediately follow it in order (unless there are other sections also involved in the logic).

NOTE: Questions selected for when a section should display must be an input type of Checkbox, Radio Button, or Dropdown.

REMINDER: As described above in the Create/Edit a Form section, when you are ready for the new form to be active for your requesters, you can click the FORM INACTIVE/ACTIVE switch in the top right, or click enable in the STATUS column for that form on the Custom Forms list.